Form precision dictates the quality of strength gains. In bodyweight training, without machine tracks to guide your motion, your core stability serves as the sole foundation.
In the previous article, we introduced the concept of the “Front-High, Back-Low Progression” and movement ladders. In this piece, we will deconstruct these five progression ladders pixel by pixel—explaining why each exercise is designed the way it is, how to execute it properly, and how to assess true mastery.
It is worth noting that these five ladders are not a rigid “mandatory leveling route” that everyone must follow at a fixed pace. Think of it as a strength roadmap helping you locate your current position and chart your next move.
Some may stay on a specific stage longer to solidify their foundation; others with better baseline strength might advance faster. There is no one-size-fits-all answer in training. The only standard is: consistent form quality with continuous physical adaptation.
🧱 Ladder 1: Foundational Moves (Incline Push-ups / Kneeling Push-ups)
If you cannot complete 5 consecutive standard push-ups during your baseline test, do not rush into higher-difficulty progressions.
The goal of this phase is not chasing reps, but establishing the correct pushing mechanics. By adjusting your body angle or shortening the lever length, you reduce part of the load, allowing your shoulder joints, wrists, and core to gradually adapt to push-up movements.
1. Biomechanics Breakdown
Primarily targets the pectoralis major, anterior deltoids, and triceps, while training your body’s stabilization capability. By supporting yourself on elevated surfaces (tables, benches) or dropping your knees, your body builds a baseline pushing force.
2. Form Micro-Details
- Incline Variation: Place your hands slightly wider than shoulder-width on a stable bench edge or table. Maintain a near-straight line from your ankles to the crown of your head throughout the movement. Lower your chest close to the surface, then press up smoothly.
- Kneeling Variation: Hands on the floor, knees touching the ground. Keep your thighs and torso firmly connected, avoiding shifting your hips backward just to make the movement easier.
- Universal Rule: Do not flare your elbows completely outward. Maintain a roughly 45-degree angle between your upper arms and torso to keep your shoulder joints in a safer, more stable position.
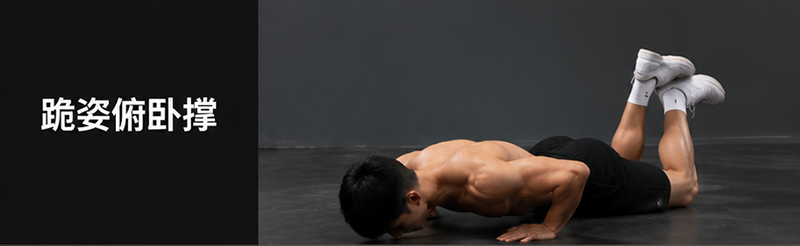
📸 Incline / Kneeling Push-up Demo: Choose a regression angle suited to your current capability to build foundational pushing strength.
❌ Fatal Errors to Avoid
- Piking the Hips: Shifting your center of gravity backward lightens the load on your chest and shoulders. While the rep might look complete, the actual training benefit drops significantly.
- Torso Instability: Relying on momentum to complete reps diminishes core engagement and increases shoulder stress.
📱 Xiaoyao Workout Logging Standard 【Custom Exercise Library】 Log either “Incline Push-up” or “Kneeling Push-up” based on your setup. A rest period of 60 seconds between sets is recommended to maintain a steady cadence.
🏋️ Ladder 2: Standard Push-ups (The Core Foundation)
Once baseline strength is established, we return to the floor. The standard push-up is the single most important foundational exercise in bodyweight pushing systems.
1. Biomechanics Breakdown
The pectoralis major, anterior deltoids, and triceps work together to generate force, while your abdomen, glutes, and legs contract isometrically to keep the body completely rigid.
2. Form Micro-Details
- Hand Placement: Slightly wider than shoulder-width, finding a natural, comfortable position for your shoulder joints.
- Movement Path: Lower your entire body in unison until your chest is near the floor, then press up smoothly. Maintain joint tension at the top without aggressively locking out your elbows.
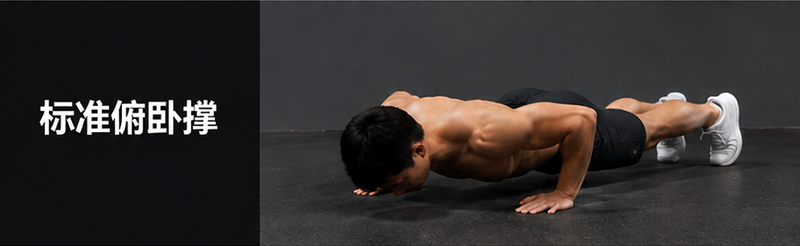
📸 Standard Push-up Demo: Keep your body in a straight line, lowering until your chest approaches the floor.
❌ Fatal Errors to Avoid
- Sagging Lower Back: Failing to brace your core places unwanted shear stress on your lumbar spine.
📱 Xiaoyao Workout Logging Standard 【Custom Exercise Library】 Log “Standard Push-up”. Set set-rest intervals to 60 seconds to build consistent endurance.
🎯 Ladder 3: Diamond / Close-Grip Push-ups (Focusing Power Inward)
As standard push-ups become comfortable, narrowing your hand stance reduces lever arm advantage, shifting greater demand onto the triceps and inner chest for increased pushing capacity.
1. Biomechanics Breakdown
The center of effort moves closer to the body’s midline. The triceps absorb a higher load, while requiring greater core anti-rotation and stabilization.
2. Form Micro-Details
- Hand Placement: Bring hands close to the midline (you can try a diamond configuration). If wrist discomfort occurs, widen the stance slightly.
- Elbow Path: Keep elbows tucked near your ribs during the descent rather than flaring sideways.
- Touch Point: Lower your chest toward your hands instead of reaching forward with your head.
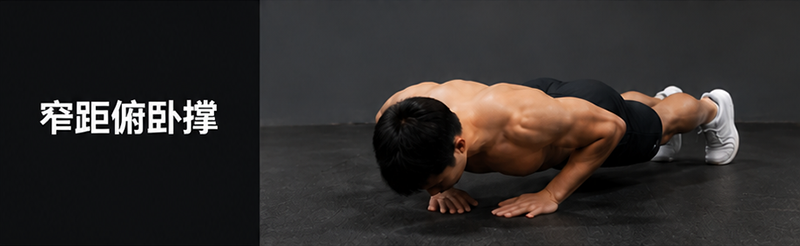
📸 Close-Grip Push-up Demo: Narrow hand placement with tucked elbows to recruit triceps and inner chest.
❌ Fatal Errors to Avoid
- Flaring Elbows: Flaring your elbows outward during close-grip variations spikes stress on shoulder and elbow joints while reducing triceps recruitment efficiency.
📱 Xiaoyao Workout Logging Standard 【Custom Exercise Library】 Log “Close-Grip Push-up”. Recommended rest interval: 60 seconds. If form degrades mid-set, apply the regression rule immediately: return to standard push-ups to finish your reps.
🏹 Ladder 4: Archer Push-ups (Bridge to Unilateral Strength)
The archer push-up is the crucial bridge leading to the one-arm push-up. Its main goal isn’t just accumulating volume, but safely conditioning your body to unilateral loading.
One arm bears the primary pushing load while the other assists with balance, demanding strong core anti-rotation strength.
1. Biomechanics Breakdown
The working arm handles the primary pushing load, requiring maximum effort from the chest, shoulder, and triceps. The assisting arm stays straight and slides out for balance, training scapular stability.
2. Form Micro-Details
- Hand Placement: Considerably wider than standard push-up width. Spread feet slightly wider to expand your base of support.
- Force Vector: As you lower to one side, bend the primary arm while keeping the assisting arm straight, shifting your body weight over the working side.
- Rep Counting: Strictly follow the “Even Rep Rule” with alternating reps (e.g., 12 reps total = 6 left, 6 right).
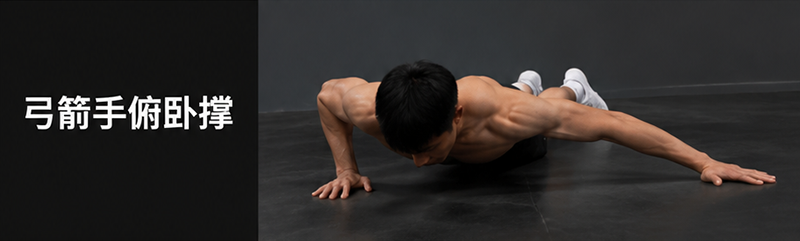
📸 Archer Push-up Demo: Shift weight laterally side-to-side while keeping the assisting arm straight.
❌ Fatal Errors to Avoid
- Over-Assisting: Bending the assisting arm turns the move into a standard wide-grip push-up, defeating the purpose of unilateral strength training.
- Excessive Torso Rotation: Twisting your hips forcefully just to complete a rep reduces effectiveness and risks lower back injury.
📱 Xiaoyao Workout Logging Standard 【Custom Exercise Library】 Log “Archer Push-up (Alternating Even Reps)”. Adjust set-rest intervals to 90 seconds and plan reps in even numbers (e.g., 10, 12, or 14 reps).
⚡ Ladder 5: The Ultimate Challenge (One-Arm Push-up Series)
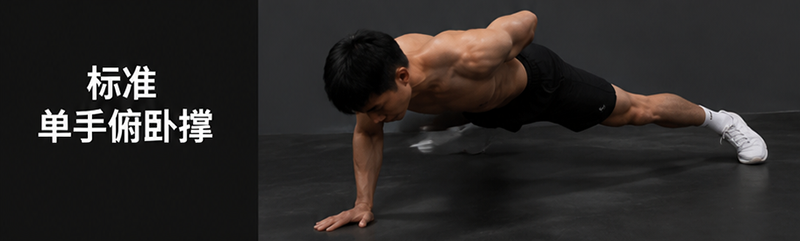
A one-arm push-up isn’t simply “taking one hand away”; it is a comprehensive test of full-body athleticism.
It demands peak unilateral push strength, core anti-rotation, scapular stability, and total-body tension. Before attempting the full variation, build a baseline using regressed positions.
5.1 Regressed Lead-in Technique: Kneeling One-Arm Push-ups
Jumping straight to standard one-arm push-ups presents too heavy a load for most. Kneeling variations reduce lower-body weight bearing, letting you focus on single-arm push mechanics and core stability.
- Form Micro-Details: Knees grounded, working hand directly beneath the chest, non-working hand behind your back. Spread knees wide to form a stable tripod structure with your working hand.
- Body Control: Keep your torso level and stable. Avoid side-tilting or hip-twisting to cheat the movement.
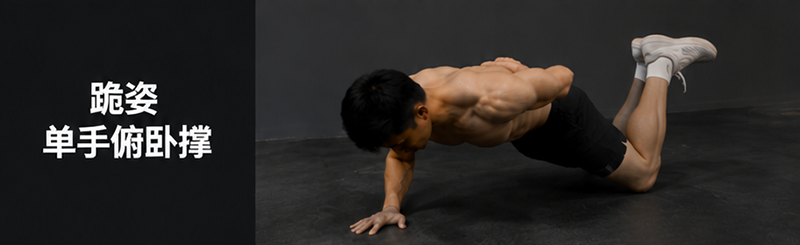
📸 Kneeling One-Arm Push-up Demo: Wide knee base for support; focus on single-arm output and core control.
5.2 Full Variation: The One-Arm Push-up
Once you can reliably control kneeling one-arm push-ups, move on to the full standard single-arm variation.
- Form Micro-Details: Spread feet wide to increase base of support. Keep the off hand behind your back. Maintain a level torso as you lower until your chest approaches the floor, avoiding twisting your body to reach depth.
- Tempo & Cadence: Maintain a controlled pace of ~2 seconds per rep, avoiding bouncy momentum. Use a “Half-Set Hand Switch” structure (e.g., for a 10-rep set, complete 5 reps on the left side first, then switch to the right).
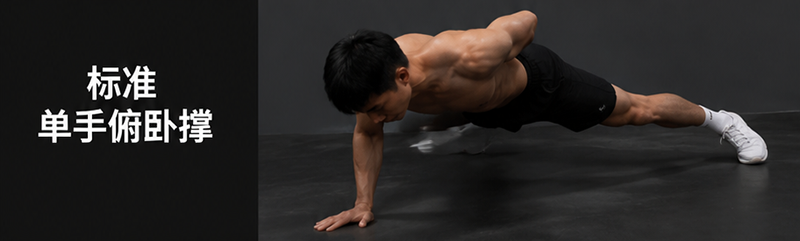
📸 Full One-Arm Push-up Demo: Working hand centered beneath chest, wide feet position for support.
❌ Fatal Errors to Avoid
- Severe Body Tilting: Rotating hips or twisting the spine to force depth when strength fails is ineffective and places heavy shear stress on the lower back and shoulder joints.
📱 Xiaoyao Workout Logging Standard 【Custom Exercise Library】 Log “One-Arm Push-up (Full)” or “Kneeling One-Arm Push-up”. Due to high unilateral demand, set rest intervals to 120 seconds to prioritize movement quality and nervous system recovery.
🗺️ The True Meaning of Movement Ladders: Continuous Growth Over “Beating the Game”
Many view the one-arm push-up as the end point of bodyweight training. However, the real value isn’t grinding out one hard rep, but the strength, body control, and long-term training habits you cultivate while unlocking it.
Movement ladders are just roadmaps; your body’s feedback is the real GPS. Find your current level, train consistently, make micro-adjustments, and you will step into your next milestone.
Fire up Xiaoyao Workout, log every set and feel, and transform a seemingly long journey into a visible, adaptable, and sustainable digital trail.